


Chapter 5
Level up your Maze test
Learn how to make the most out of your Maze test and collect actionable insights from users fast.
Add Conditions
You can apply Conditions to your mazes to create contextual, dynamic flows based on testers’ input. This means you can easily send them on a custom path after a completed mission, follow up with your testers, ask screening questions before they get started, and more. The result? Richer data for you and a customized user experience for your testers.
You have the option to add Conditions to each block type, which you can enable via the toggle at the bottom of the editor in the center screen.
Once you enable the conditions, you’ll have the option to have users either jump to a specific block or continue to the next block. For example, if users select ‘No’ in a Yes/No block, you can add an Open Question asking ‘Why?’ for more context. Whilst all users who select ‘Yes’, skip the Open Question and carry on to the next question. You can find more examples of how to use Conditions here.
Tip 💡
Test your Conditions by running through your test via the preview mode.
Add a legal block
When it comes to testing in larger organizations, we understand that you may need an additional layer of formality to protect information you’re about to share. If you need to present an NDA to a customer before enabling them to test, Maze has a block for that.
Selecting a Legal Block enables you to upload a PDF of terms that testers must agree with to continue. If they don’t click ‘I agree with the terms’, they will be unable to proceed to the next block.
Product tip 💡
Legal blocks are only available to our Enterprise customers. Contact our sales team to learn more.
Customize the Welcome & Thank You Screens

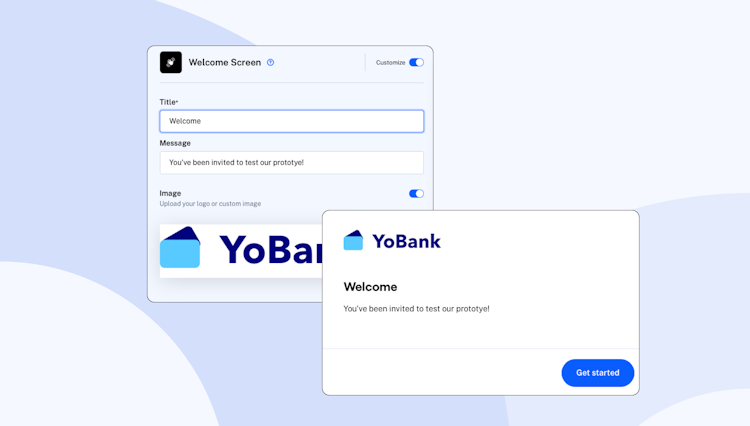
You’ve built your mazes with your desired sequences of blocks and you’re almost ready to start testing with users. Before you send your maze live, why not customize its welcome and thank you screens to introduce the test, add your brand’s tone of voice or show your appreciation for their time.
Product Tip 💡
Customizing Welcome & Thank You screens is available on all paid plans.
Besides the blocks that you created, your maze has two more adjacent blocks by default: the welcome and thank you screens. You can view the default messages on these screens in Preview.
If you've purchased a paid plan, you're able to customize these screens with your own messages and images. This allows you to welcome your users with a custom message and conclude the testing sessions with your own parting words. Here’s how to customize the Welcome Screen and the Thank You Screen.
If you’re in a hurry or don’t want to make changes to these screens, don’t worry. Maze has general text that works for all tests you send to users. You can view the default Welcome and Thank You screens in preview mode.
Change your maze’s settings
The options panel includes a few settings for working with your maze test. Here are the available options for your maze:
- Set a password: if your maze includes confidential content, you can restrict access with a password if you’re on our Organization plan.
- Scaled prototype: disable prototype scaling available by default
- Delay success message: add a period of time (ms) to delay the success message when users complete missions
- Connect to Slack: get notifications on results activity for your maze through Slack.
- Delete: delete your maze. Please note that if you delete your maze, all included blocks and accumulated results will be deleted.
You will find these options in the top right corner menu under the wheel sign.
Product Tip 💡
Good to know! After you send your maze live, you'll also be able to stop and restart recording from the Options menu.