


Chapter 6
Sending mazes with Reach
Reach empowers you to curate your very own database of research participants and capture audience insights as you send campaigns.
Anyone who has run product research knows there are many hurdles to overcome. One of those hurdles or rather, sequence of hurdles, is participant management. It’s one of the key steps of research that can’t be skipped, sacrificed, or swindled because it’s crucial to the success of your research initiatives.
Participant management is the effective organization of, and communication to, product research candidates to create a good participant experience and provide actionable insights for the researcher.
Typically, the process is made up of:
1. Participant data: Enriching contact information with properties relevant to your business and research needs
2. Segmentation: Grouping participants to run more targeted research and improve relevancy of results and needs
3. Communication: When were they last contacted? How many times have they been contacted? Are they still subscribed?
4. Engagement: Did they take part in the last research you invited them to? If they did, did they complete the task? How long does it normally take them to respond if they do at all?
Reach empowers product teams to turn lists of participants into custom segments that they can send targeted mazes to. All the while, collecting valuable engagement insights that strengthen the database you curate, the relationships with your participants, and the research insights you collect.
With Reach you can:
💡 Build a database of high-quality, responsive participants: Create your own pool of participants and as you run research, Reach will enrich your database with engagement insights that help you curate segments to improve response rates.
💡 Access participants where and when tests happen: Consolidate tools and empower your product team to reach the right participants as and when they need to. With Reach, you can complete the entire research workflow in one place, from creating tests to sharing with participants, and reviewing insights.
�💡 Send targeted remote tests, faster: Build Segments with criteria that match your research needs and collect relevant insights from them faster by sending direct mazes in bulk as email campaigns within Reach.
💡 Build empathy and understanding: Reach’s progressive profiling builds the entire picture for individual participants seeing historic research they’ve participated in and Segments they belong to.
In this chapter, we’ll walk you through how to use Reach, breaking it down into four core components:
- Building a database
- Creating Segments
- Sending research campaigns
- Engagement insights
Building your Reach database
Think of your database as the center of Reach. It houses all of your research participants and is the starting point for all Reach functionality. To start adding participants to your database, you’ll need to upload a .csv file. Once you have your first pool of participants, you’ll be able to manually add more one by one or upload another .csv.
Tip 💡
Check your email preferences of participants before you add them to the database for GDPR reasons.
Bringing in your first participants via .csv
- Select the .csv of your customers, contacts, or users from your tool, maybe from your CRM or product analytics tool. Your .csv will need to have an email address property to import.
- Ensure the .csv holds properties for demographics and information that may be relevant to your business, product, and research. For example, plan, location, device type, role title, etc.
- Once you select the file you’d like to upload, you’ll be prompted to match the .csv file column properties to Reach fields. You need to confirm what type of data the fields will hold from a list including text, numerical, boolean, date, and so on.
- Then you’ll be asked to review the data you’re importing. In this screen you’ll be able to edit any mistakes you find in any fields, track changes you make, and identify any duplicates. When you’re happy with how your participant data is looking, continue to import.
Tip 💡
If you choose to import duplicates further down the line, Reach will overwrite the original’s data with new imported data.
Manually adding participants
- Now that you have your first participants in the database, you’ll see you have the ability to add more using the ‘Add participants’ button in the top right corner.
- Here you have the option to upload another .csv file but also to manually add a new participant. If you choose to manually add a participant, you will be presented with an empty participant profile to fill out where each of the properties match the fields you imported from your first .csv.
- To create a new participant, you must have an email address. Once you’ve completed the profile, save and you’ll see the participant appear in your database list.
Tip 💡
See the total number of participants in your database at the top and bottom of your database screen.
Participant profiles
Each Reach participant will automatically be given their own profile, which holds all of their data. This includes the properties you created and also additional data that will populate once you start creating Segments and sending campaigns.
You’ll be able to see:
- A list of Segments participants belong to
- Recent activity of the mazes the participant has completed
- Engagement insights of their campaign activity
Tip 💡
The participant profile is also where you can delete a participant. When you delete a participant, this will also delete maze sessions they completed as part of a Reach campaign.
Creating Segments
- When you’re creating mazes for different research initiatives, each one is likely to require a slightly different audience. The more targeted you are with the participants you invite, the better response rates you can expect.
- Reach enables you to create Segments to send mazes to by saving filters as criteria. Your Segments will be visible to the left of your database.
Tip 💡
The Segments are dynamic so any new participants that match the saved criteria will be added to the Segment. Perfect for Segments where filters are time based, for example, where last contacted date was more than 14 days ago.
Adding filters to your database
- Above your database of participants, you’ll see a button titled ‘Filters’. Click that to start filtering your list of participants by custom criteria.
- You’ll be able to filter by properties you’ve imported, meaning you can group demographics, uploaded product behavior, or customer traits.
- You’ll also be able to filter my Reach metrics, like number of campaigns sent, last contacted date, number of mazes completed, and so on.
- Whilst you’re adding filters, you’ll see your database change in real-time to get a grasp on the participants falling into this group and the size of Segment you could create.
- When you’re happy with the filters you’ve set, to save it as a Segment click ‘Save filters’.
Editing Segments
- Give your Segment a name that is clear and easy to understand, remember your database is shared with the rest of your team in Maze.
- If you need to change the criteria of an existing Segment you can do so at any time by adding, removing, or changing the filters applied by clicking ‘Filters’ at the top of the Segment list.
- Delete Segments by clicking on the ‘...’ and following the prompts.
We recommend you keep your Segments as tidy as possible to help you and your team navigate and use them on the day to day.
Sending research campaigns
Now that you’ve built your relevant Segments, you can now send them campaigns directly from Reach. Using Reach to send campaigns is handy because you can track how your participants engage with your research rather than just the email itself like most CRMs.
There are two ways to send mazes to Segments.
Sending from Reach
- Select the Segment you’d like to send a maze to from the list next to your database.
- Once your Segment is open, you’ll see the send maze button in the top right. Click that to get started in creating your campaign.
Sending from your mazes’ Share tab
- Alternatively, you can send a campaign from your Share tab in maze.
- Once your maze is live, go to the ‘Share’ tab and click ‘Send email campaign’ to send the maze directly to a Reach Segment.
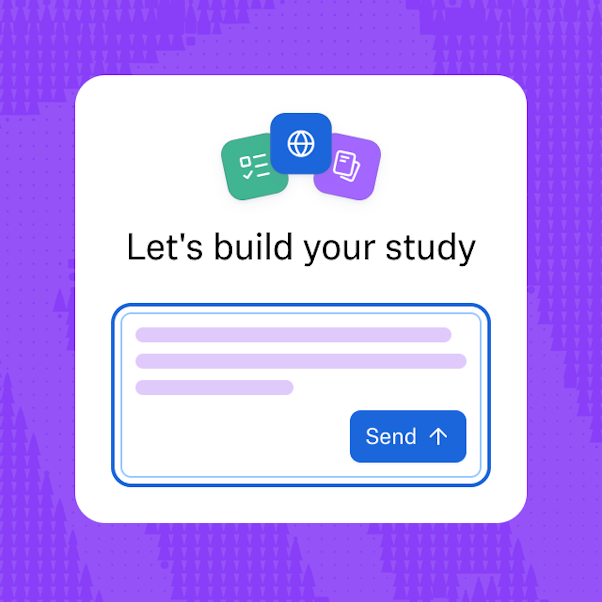
Building your campaign
Whichever option you choose, you’ll be taken to the campaign builder. In this modal, you’ll see a preview of your email on the right hand side and the adjustable settings to the left.
On the left you’ll see the following prompts:
- Sender name: Let your participants know who this email is coming from
- Subject line: Add a relevant and eye-catching subject line to increase engagement from your recipients
- Sent from: Choose the email address that your campaign will be sent from
- Reply-to: Choose the email address you would like responses to be sent to
- Segment: Double check the Segment you’re sending the maze to
- Maze: Choose the maze you would like to send to this Segment
Review the settings you’ve made in the next screen, where you’ll also get a breakdown of your recipient list. You have the option to send yourself a test email, where you can double check how the email will look in your inbox and do any final checks.
Tip 💡
If you’re on the enterprise plan, you’ll be able to customize the email address you send from further by adding your own custom domain. For example, rather than sending from example@mazetesting.com your campaign will be sent from example@maze.com.
Then once you’re ready, click ‘Send campaign’ and you’ll receive a final checkpoint to ensure you’re ready to send. Here you’ll see a last breakdown of how many participants this campaign will reach. When you’re sure, go ahead and click send.
Collect engagement insights
Now that your campaign is in action, Reach will start learning more about your audience and picking up on campaign and individual research engagement.
Campaign Engagement
From your share tab for your Maze, you’ll see a new engagement table appear below. This will hold data on each of the different share methods you send from, so if you share via URL link, or send an email campaign, or hire panel testers they’ll each show as a source in the table.
Then for each source, you’ll receive data on:
- Sent: Number of participants this maze was sent to in this source. This will only populate for Reach email campaigns and Panel testers. Maze can’t pick up data for how many the URL link was sent to.
- Started: Number of participants who completed the first maze block.
- Completed: Number of participants who completed the entire maze.
Individual engagement insights
For each participant, Reach will automatically collate the following data as you run research campaigns:
- Last contacted: The date which the participant was last sent a campaign from Reach
- Subscribed: The email preference of the participant for research campaigns
- Sent: The total number of campaigns/mazes this participant was sent
- Started: The number of mazes this participant started (completed first maze block)
- Completed: The number of mazes this participant completed
- Response Rate: The percentage of mazes this participant completed out of all campaigns sent
- Time to Respond: The time taken to start a maze sent via a Reach campaign
You’re all set!
The more you use Reach, the more you learn about your participant behaviors when it comes to product research. The more you can empathize with your audience, the better targeting for your research campaigns, and ultimately the more relevant and timely results you’ll collect to help spur your decision-making.